|
Tutorials
Extract Part of an Image
01/28/2003
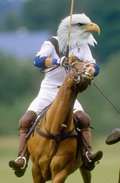
Photoshop's Extract command (Filter>Extract) is designed to
pull portions of an image out of the overall image and eliminate
the rest. This feature works best when there is a good contrast
between the object to be extracted and its surroundings.
On today's show, I'll show you how to use the Extract command
for best results.
Extract an image
Since the balance of the image is eliminated, it is advisable
to work on a duplicate of the original.
1. When the command is called up it pops up a separate dialog
box where all the functions are utilized. The image to be
worked on
appears in the box.
2. Using the Edge Highlighter Tool (top left), the area to
be extracted is traced. The trick is to use a brush size
large enough
so the
edge of the element and the colors of the background are
equally seen within the stroke. You can switch brush sizes
if necessary.
3. Once the entire element is traced, the part to be extracted
is filled with the Fill Tool (bucket). This tells the
Extract command which area you want to be left with.
4. You can now preview it or just click OK and the element
will appear in a single layer with all the rest of the
image eliminated.
|