|
Tutorials
Create a Rainy Sidewalk with Photoshop Filters
05/31/2001
1. To start, create a file that measures 800 pixels wide by 600
pixels high. The resolution can be whatever you wish, but for the
sake of speed, 72ppi is preferable.
2. Select a dark gray for the Foreground color. This could be the
gray swatch found at the upper right of the Swatches palette in
the top row. Choose a light gray for the Background color. The
seventh swatch in from the right in the top row will do fine.
3. With the Gradient tool, lay down a gradient with the dark gray
at the top going down to the light gray at the bottom.
4. Reset the color swatches back to black and white. This is done
by clicking on the reset icon at the lower left of the color swatches
in the Tool palette.
5. Using the Paintbrush tool with the second brush size from the
left in the brush palette, create some rough lines to simulate
cracks in the sidewalk. Three or four jagged lines will be sufficient.
6. Now comes the first filter. Choose Add Noise (Filter>Noise>Add
Noise). Give it a small percentage of about five. Press OK.
This will add the texture needed to simulate the concrete material
for the sidewalk. It will also add randomness to the gradient that
the next filter will use to add its effect.
7. You will now add a pool of water to your sidewalk as if the
rain has just stopped. Choose the Plastic Wrap filter (Filter>Artistic>Plastic
Wrap). Adjust the settings to match. Press OK.
The result should look like the wet sidewalk.
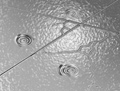
8. Now you need something reflected in the water. Find an image
that is looking up at trees, buildings whatever you wish to use.
9. Resize it to the size of the sidewalk image.
10. Import it into the image of the sidewalk.
11. The affect you want is that of looking down onto the sidewalk
seeing the reflection. To achieve this effect, rotate the layer
with the image you have imported 180 degrees (Edit>Transform>Rotate
180).
12. You will now distort the image as if there is rippling water
on the sidewalk. Another filter will give you the desired effect.
13. Choose the Ripple filter (Filter>Distort>Ripple). Give
it a high percentage of about 548 with the size set to Medium.
Press OK.
14. Set the layer to Multiply mode in the layer's palette and reduce
the opacity to 75%.
15. Flatten the layer into the background to make a single layer.
This is done via the pop-up menu in the layers' palette.
16. Now comes the finishing touch: that last drop of water suspended
from up above somewhere in your scene. Select a small oval somewhere
in the image with the Elliptical selection tool. Make sure the
selection is small. This is a drop of water, not a bucket-full.
17. Using the Eyedropper tool, choose one of the darkest tones
in the image.
18. With the Airbrush tool set to the 27 brush size, paint in two
dabs of color within <graphic pop 11>the selected area.
19. Now choose the lightest tone of the image and paint two more
dabs of color.
20. Now choose the ZigZag filter (Filter>Distort>ZigZag).
Increase the amount to about 26% and press OK.
21. Deselect and sit back and few your work. You're done.
|